Introduction
This app allows you to easily access thousands of titles available in different languages and formats with which you can improve your training and enjoy your leisure time. You can consult the resources online or download them to use them later without an Internet connection.
Currently the app is compatible with the following devices:
- iPhones and iPads that use version iOS 13 or higher.
- Mobile phones, tablets, chromebooks and eReaders that use Android 5.1 or higher.
The app features a menu bar at the bottom that displays four main sections:
- Home: In this section you can view carousels presenting content on different topics that those responsible for the platform have prepared for you to discover.
- Search: In this section you will find the search engine that will allow you to locate the content that interests you as well as a selection of filters.
- Bookshelf: This is where you can find all the titles you are currently using and access their content. You can choose whether you want to consult the resources online or download them to your device so you can access them later without an Internet connection.
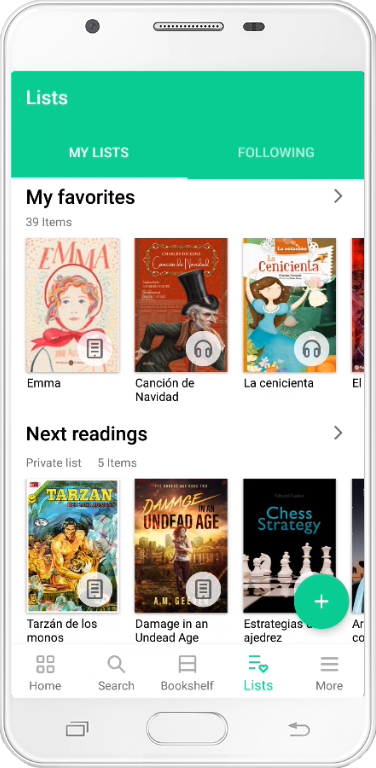
- Lists: In this section you can consult all the public lists that you are following, your lists of favorite titles and authors, and you can also create your own personalized lists to organize the titles that interest you.
- More: This last section displays a side menu where you can find more additional features of the app that we will describe later in this guide. In this menu you will also find the Settings section where you can establish your configuration preferences for some features of the app.
Find the titles you are interested in
If you are looking for content that interests you and you have not found it in the carousels in the Home section, go to the Search section. In this section you will find several tools that will help you locate the titles you want. Below, we will describe each method in detail.
Use the application search engine
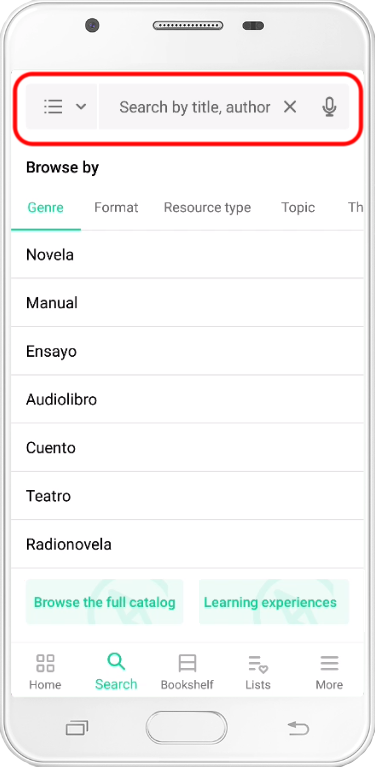
At the top of the Search section you will find the app's search engine. You can enter any term and the app will retrieve all the related results and show them ordered by relevance. As you type in the search box, a drop-down menu will appear with suggested results that match what you are typing. You can select one of these suggested results or finish typing and run the search.
You can narrow the search to be performed by displaying the menu on the left side of the search bar and selecting a criterion. The default option is All, with it the app will search for the terms you enter in the search engine in all the tags of all the titles. On the other hand, if you select Author, Title, Publisher or Topic, the application will search for the terms you have entered in the search engine only on the tag you have specified, thus providing you with more accurate results.
If the device you are using has this functionality, a microphone-shaped icon will appear on the right side of the search box that will allow you to perform voice searches, dictating to the app the terms to search for instead of writing them by hand.
Use the app's quick searches
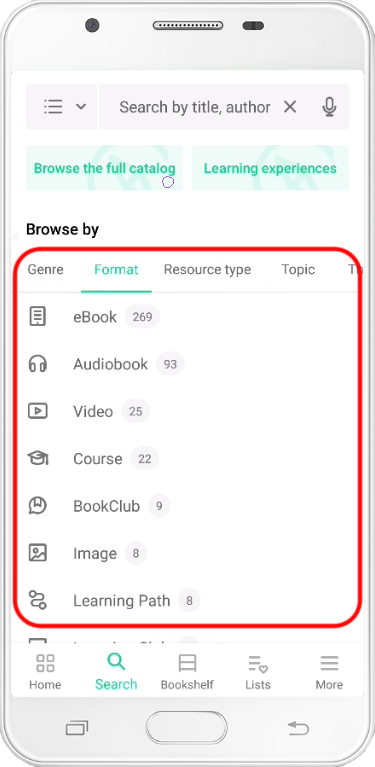
In the Search section, just below the search engine, you will see a section called Browse by where several tabs will appear with options for quick searches. You can navigate between tabs by swiping the screen left and right. When you find a criterion that interests you, click on it and a quick search will be carried out for that criterion.
Explore the full catalog
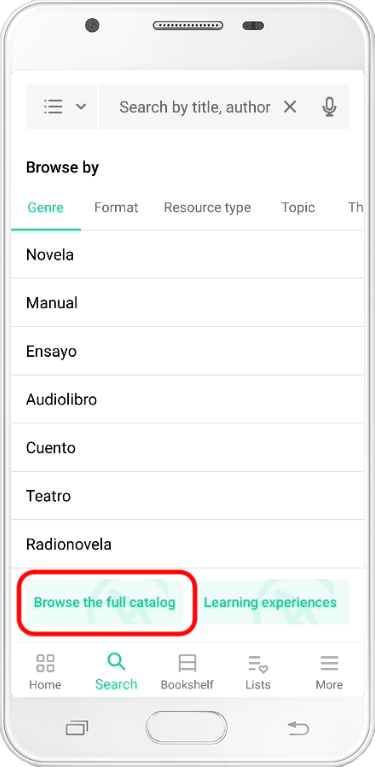
At the bottom of the Search section you will find a button called Browse complete catalogue that allows you to perform a search without entering any terms in order to recover all the titles on the platform.
Filter search results
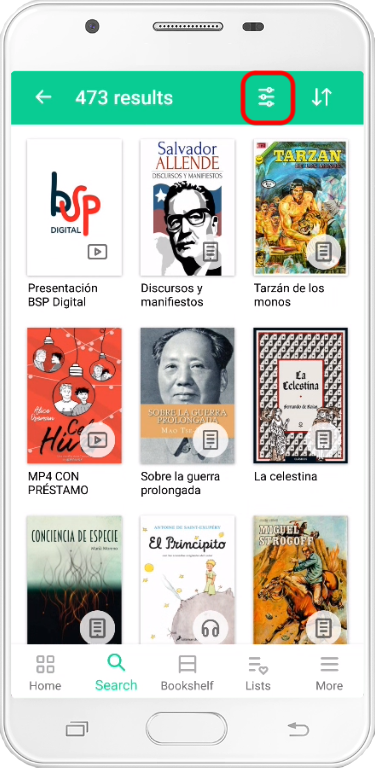
Whether you have entered terms in the search engine, you have performed a quick search or have used the Explore full catalog button, the application will show you all the results you found on a new screen. In order to further narrow down these results and further refine the search, you can use the filter bar that is displayed by pressing the button located in the upper right part of the search results screen.
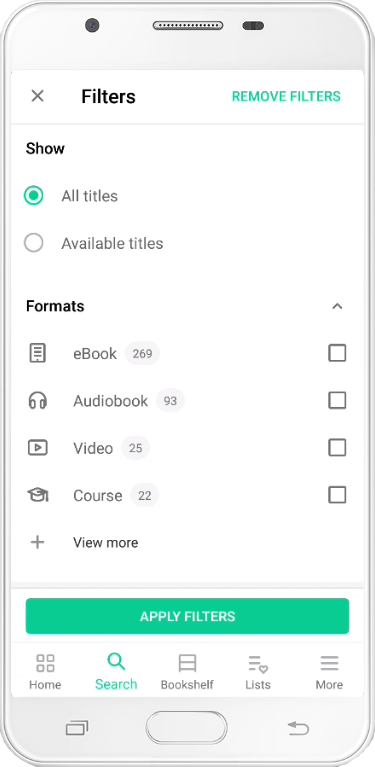
Once the bar is open, you will find several filters that you can apply to refine the search results. With each filter you select, the list will be automatically filtered. You can select as many filters as you need and, once you finish, by pressing the Apply filters button, the bar will close and you will be able to see again the results of the search you did but now filtered by the criteria you have indicated. In the same way, if you deselect a filter that you have marked in the bar, it will no longer be applied to the search results.
If you want to delete all the filters you have set at once, press the Delete filters button at the top right of the filter bar.
Access the content of a title
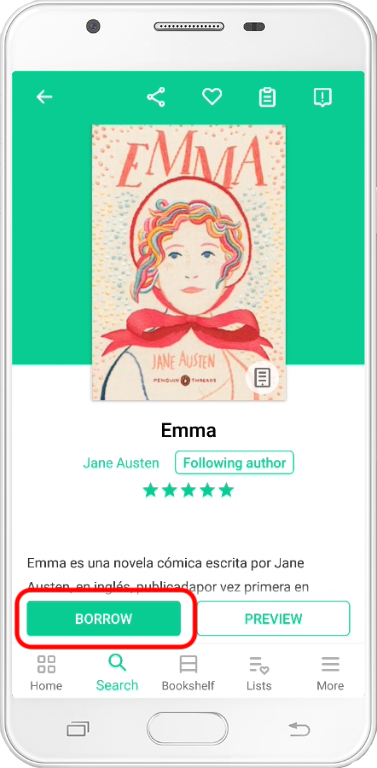
Once you have located the title that interests you using one of the methods that we have explained in the previous block, you will have to click on it to access its file. In this tab you will find useful information about the resource, such as a summary, the name of its author, the language, a preview, etc.
In order to start using it you will have to click on the Borrow button. This button could also be called Access depending on the platform configuration. If the resource is not available at this time, the Hold button will appear instead of Borrow/Access. To learn more about reservations, see section number 4 of this guide.
Once you press the Borrow or Access button, the app will automatically take you to the Bookshelf section where the title will appear so you can consult it. This section will show all the titles you are currently using. To start using the title, click on it and the corresponding viewer will open depending on the format of the title. For more information about the scopes and the capabilities they offer, see sections 5 and 6 of this manual.
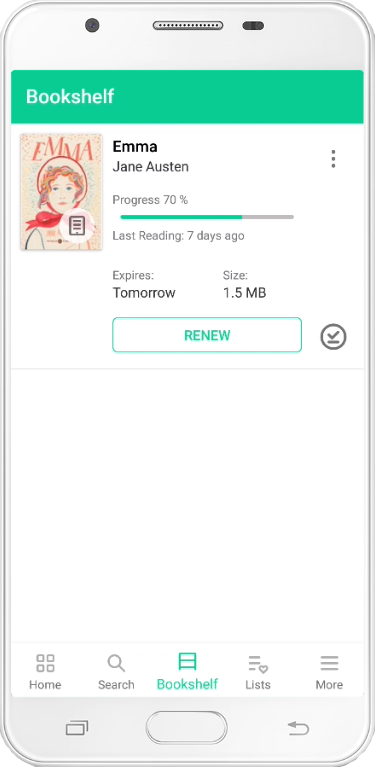
Each of the titles you have in the Bookshelf section will tell you how long you have that resource available. This period may vary from one title to another and depends on the policy established by those responsible for the platform. When a title's usage time expires, it will be automatically returned and will no longer appear in the Bookshelf section.
By default, the app will not automatically download the titles you add to your Bookshelf. You can download them manually by pressing the arrow-shaped icon or you can adjust the app settings so that it downloads the titles automatically when you add them to the Bookshelf (see section 12 of this manual). If you have the content downloaded on your device, you can access it even if you don't have an Internet connection. You can also access the content even if you haven't downloaded it, but in that case you will need an Internet connection.
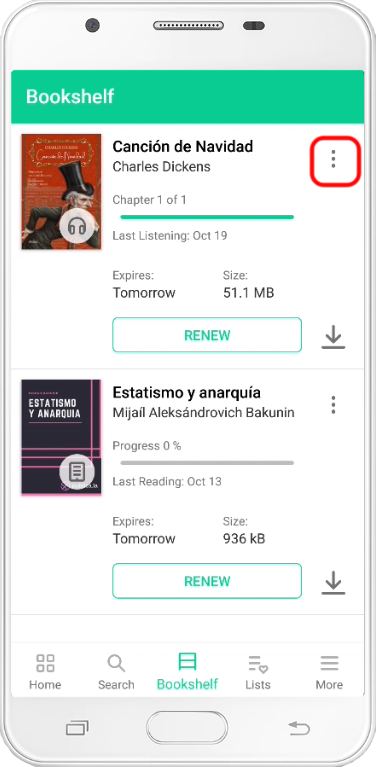
At any time you can delete the file of a title that you have downloaded. To do this, press the three-dot icon displayed on the right side of the title entry. In the menu that will be displayed you will find the option to delete the file.

By default, all the titles you have in the Bookshelf will be sorted by last used date.
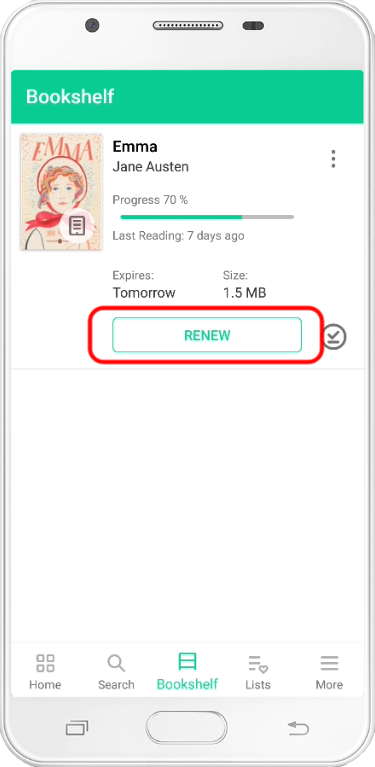
Extend the usage time of a title
If those responsible for the platform have decided to allow renewals, when there are three days or less left for the usage time of a title to end, a Renew button will appear on the Bookshelf screen. strong> that will allow you to extend the period during which you will have it available. Each title is only allowed to renew once.
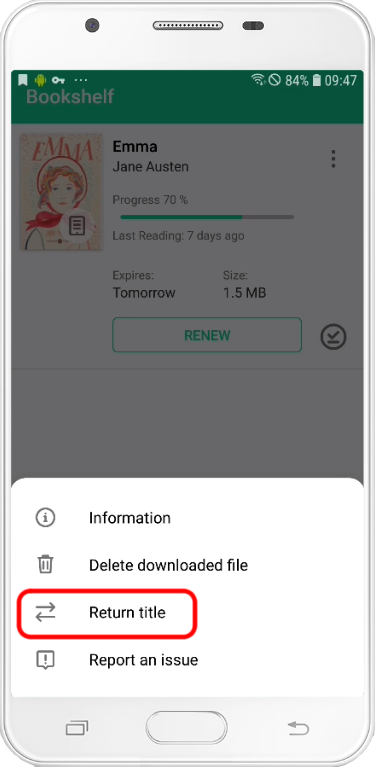
Return a title
When a title's usage time expires, it will no longer appear in the Bookshelf section. However, if you want to return a title before the date indicated in the Bookshelf section, you can do so by pressing the three-dot button that accompanies the resource. This button will display a menu in which you can see the option Return title.
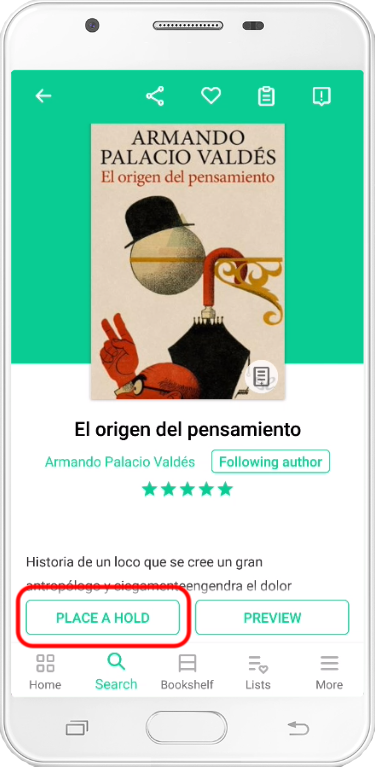
Hold a title
When a title is not available because it is already being used by the maximum number of simultaneous users allowed by its license, the Borrow/Access button on its tab is replaced by the button Hold. If you press this button, you will be included in a waiting list with the rest of the users who are interested in accessing that title.
Once the title is returned by the users who were using it, the reservation list will advance and notify in order the users who were waiting to access that content. Once your turn arrives, you will receive a notification telling you that the title you were waiting for is now available for you.
The time to accept a reservation that you have available is limited, so you should not take too long to access the app and make the loan effective. If you do not accept the reservation when it becomes available to you, it will expire and the title will become available to the next user on the waiting list. Normally, the time in which a reservation is available to you is two days, but it can vary depending on the type of content it is and have a different period.
The default behavior of the application is to accept holds automatically, so when you access the app, the reservation will have already been accepted and you can find the title on your Bookshelf , ready to be consulted. If you do not want the application to automatically accept reservations and prefer to do it manually, you can change this behavior by following the steps explained in section 11.2 of this manual.
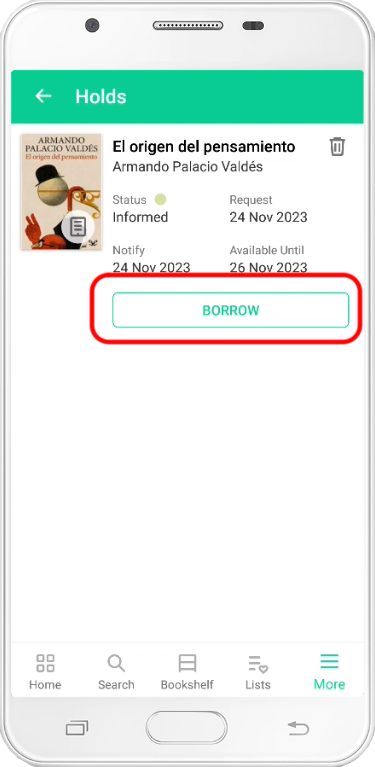
To manually accept a hold you must open the More menu of the application and access the Holds section, where you will see the button appear Borrow/Access. Once you press it, the title will become available on your Bookshelf so that you can consult it in the way we have explained in section 2 of this guide.
Turn page and synchronize reading
When you click on an e-book in the Bookshelf section, the book viewer will open so you can read it. The viewer's functionalities are the same whether you read streaming or if you have the book completely downloaded to your device, but keep in mind that to read streaming it is necessary to have an Internet connection.
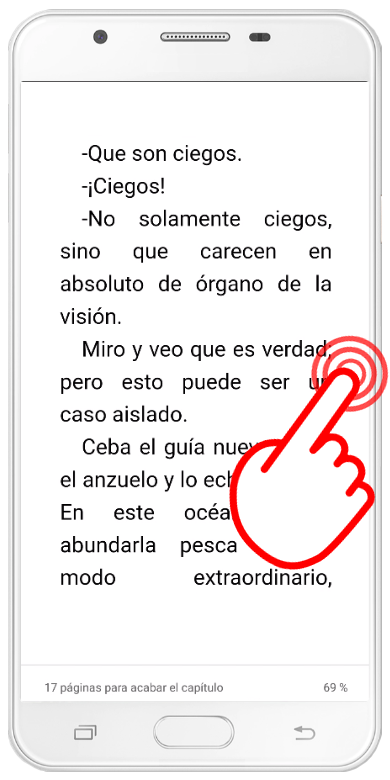
You can forward and back through the pages of the book in three ways:
-
By tapping on the right or left margin of the book.
-
By sliding your finger over the text to the right or left of the screen.

-
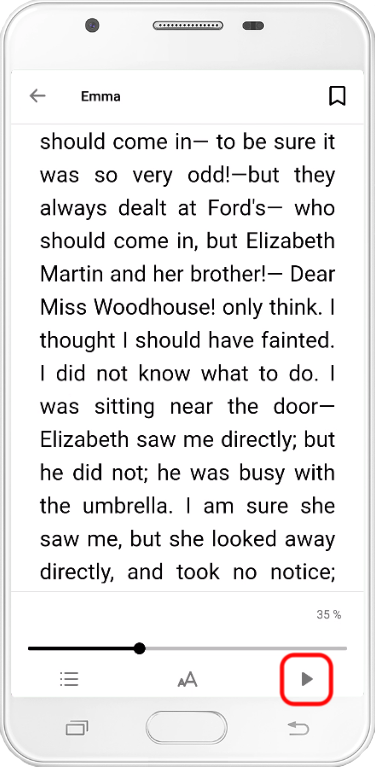
Tapping the center of the screen to bring up the menu bars and dragging the reading point forward or backward across the progress bar that appears in the bottom bar.

Please note that some mobile phone or tablet models may have their own screen gestures that interfere with some of the gestures listed above. If this occurs, you will need to review your device's operating system settings.
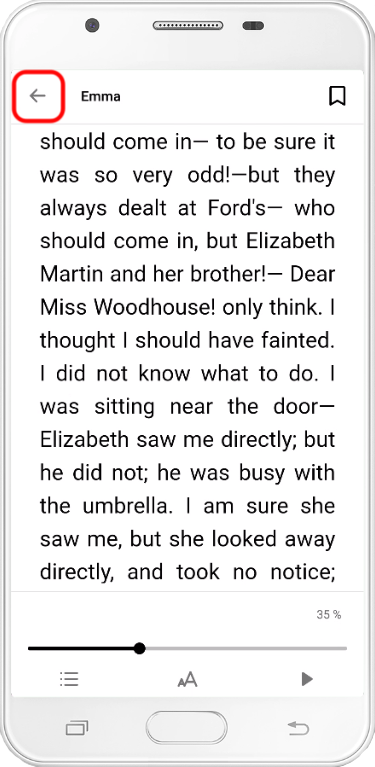
To end your reading session, close the viewer and return to the Bookshelf screen, tap the center of the screen to bring up the menu bars, and press the arrow button in the upper left corner of the screen. screen.
If your account is linked to multiple devices, the current reading point will be synchronized with the rest of the devices without you having to do anything. You just have to remember to close the book viewer when you finish reading.
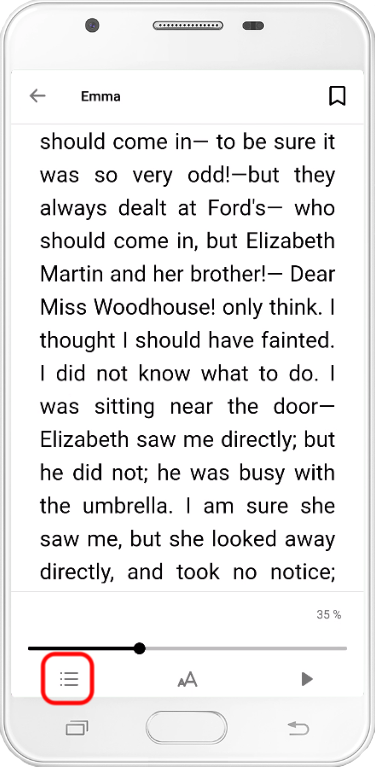
Navigate using the table of contents
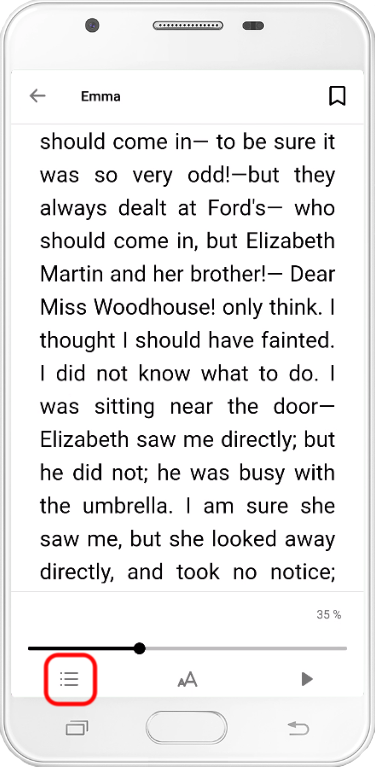
If you click in the center of the page, the menu bars will appear. The first icon in the bottom bar is the one that gives access to the table of contents of the book.
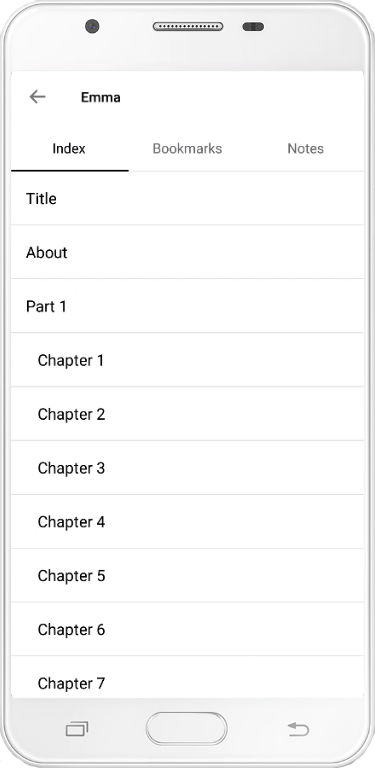
In it you can see the index of chapters and, by clicking on any of them, the viewer will take you directly to it.
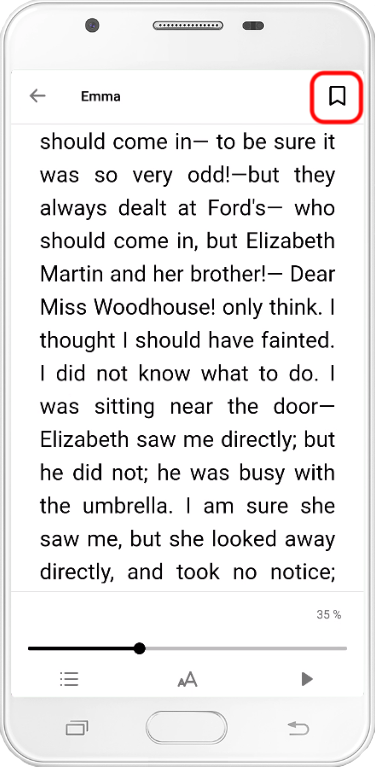
Add a bookmark
Although the app saves your progress so you can always pick up where you left off, there may be parts of the book where you'll want to bookmark so you can return to them later. There are two ways to add a bookmark:
-
By tapping on the upper right corner of the page.

-
By tapping the center of the screen and, when the menu bars appear, pressing the bookmark-shaped button in the upper right corner of the screen.
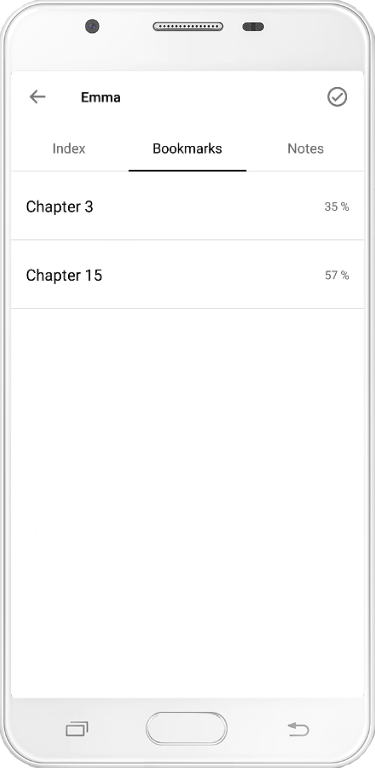
To return to one of the pages where you placed a bookmark, tap the center of the screen to bring up the menu bars and click on the second icon starting from the left.

Once you have pressed that button, the Notes and bookmarks menu will open. In the Bookmarks tab you will find all the ones you have placed. By clicking on one of them, the viewer will take you to the page where that bookmark is located and by clicking on the trash icon, you can delete it.
The bookmarks are synchronized with the rest of the devices to which you have linked your account without you having to do anything more than close the viewer when you finish the reading session.
Underline text and add annotations
The application allows you to underline parts of the text with special interest so you can revisit them later. To do this, you just have to press and hold the text you want to underline until the text selectors and a floating menu appear.
Adjust the text you want to underline with the text selectors and, when you have all the text you are interested in highlighted, select an underline color from the floating menu.
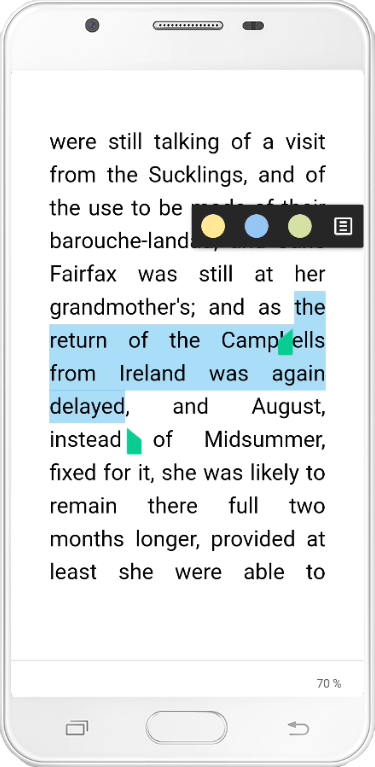
If what you want to do is put an annotation related to the text you have selected, click on the speech bubble icon in the floating menu. The color used in this case will be yellow by default. If you want to change it, click on the underline again and choose another color from the floating menu.
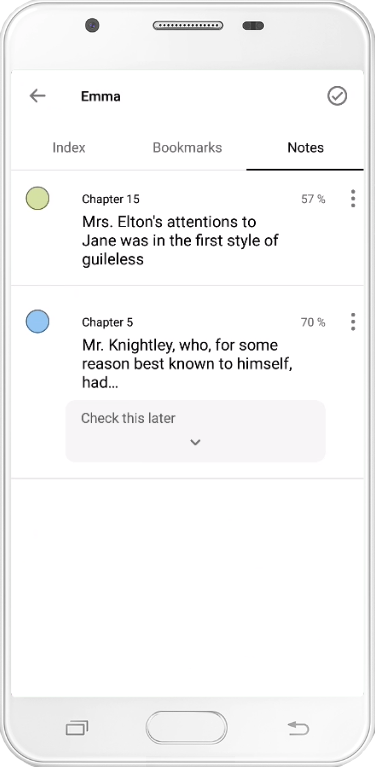
You can access all your notes and highlights by tapping in the center of the screen and, when the menu bars appear, clicking on the second icon from the left.
In the Notes tab of the Notes and Bookmarks screen you will find all the highlights and notes you have placed in that book. If you click on an underline or note, the viewer will take you to the page it is on.
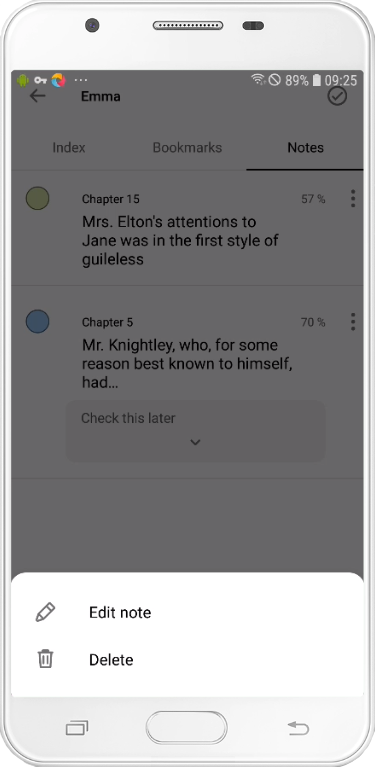
To edit an annotation or add one to an underline that didn't have one, you can do so by clicking on the underline on the book page and clicking on the speech bubble icon in the floating menu. Alternatively, you can also do it from the Notes and Bookmarks menu by clicking on the three-dot-shaped icon that accompanies the underline and selecting Edit in the drop-down menu that appears.
Use the dictionary, translator and Wikipedia search
If you hold down on a word, the text selectors will appear (the same ones used to underline). When you set the selectors to cover just one word, a floating menu appears with the definition of that word in the dictionary. If you slide to the left on that floating menu, you will be able to see the Wikipedia article corresponding to that word and a tool that will allow you to translate that word into other languages.

In order to use the dictionary on iOS you need to access the device's language settings and download the corresponding Apple language pack.
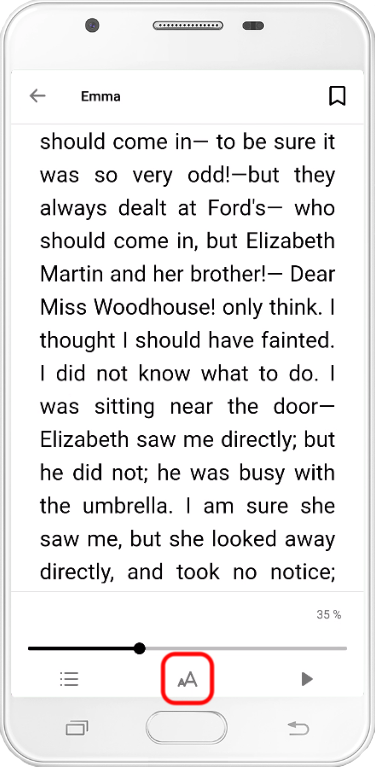
Change text and display settings
When you click in the center of the page, the menu bars will appear. The second icon in the bottom bar will give you access to a menu where you can change the text and page settings.
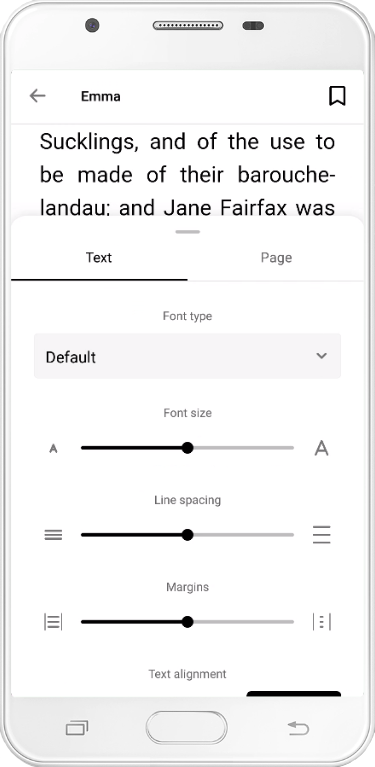
In the Text tab you can change the font of the book, the font size, the distance between the lines (line spacing), the thickness of the margins and the alignment. The text of the book will automatically adjust based on the modifications you make.
If the platform has accessibility features, a special font called OpenDislexyc for people with dyslexia will appear in the text settings.
Not all books allow you to modify text settings. If the format of the e-book does not allow you to modify anything, when you click on the text settings icon, an information message will appear and you will only be able to modify some settings.
In the Page tab you can change the background color of the page, adjust the brightness, choose between displaying the text in one or two columns, select whether pagination should be done with page numbers or percentage of progress or decide if you want the screen to automatically turn off while you read or not.

Use the text-to-speech functionality
If the platform has accessibility features, when you click on the center of the book page the menu bars will appear and you will notice that a last triangle-shaped icon appears in the bottom bar. This icon allows you to activate a functionality that will use the voice engine of your device to read the book to you.
If you have an Android device and the voice engine does not read correctly or is not using the correct language, check your device settings to see if it is using Google's voice engine, as some manufacturers add their own by default that may not work. be compatible with our application.

If the layout of the book you are using makes it impossible to use this functionality, when you click on the text-to-speech button, an informative message will appear.
Skip forward, rewind and sync playback
When you click on an audio or video in the Bookshelf section, the multimedia player will open so you can listen to or view it. The player's functionalities are the same whether you use it in streaming or if you have the title downloaded to your device, but keep in mind that to access streaming videos or audios you need to have an Internet connection.
You can forward and back the playback of an audio or video in several ways:
-
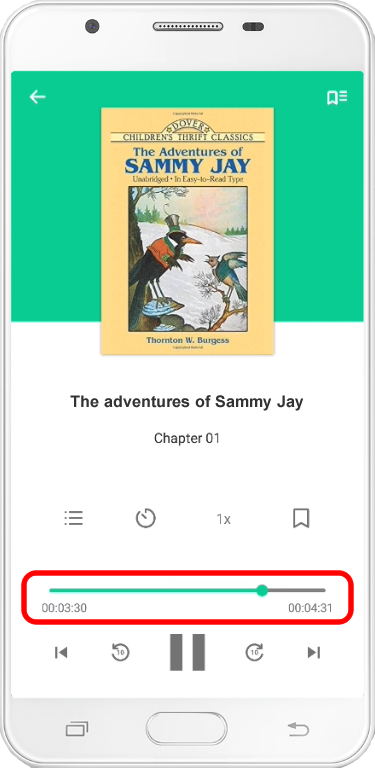
Sliding your finger along the progress bar at the bottom. With this you can advance or go back in the playback of the current chapter to the point you want.
-
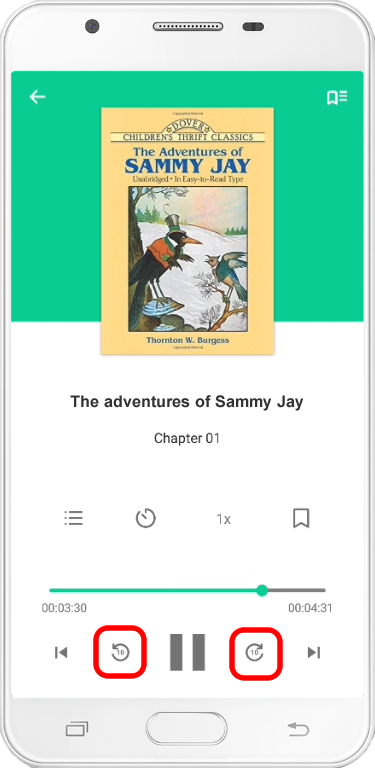
Using the forward or rewind buttons 10 seconds in playback.
-
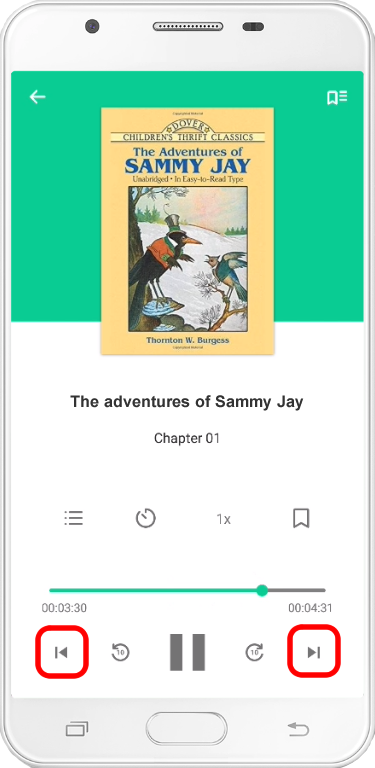
Using the triangle-shaped buttons that serve to advance to the next chapter or go back to the previous chapter.
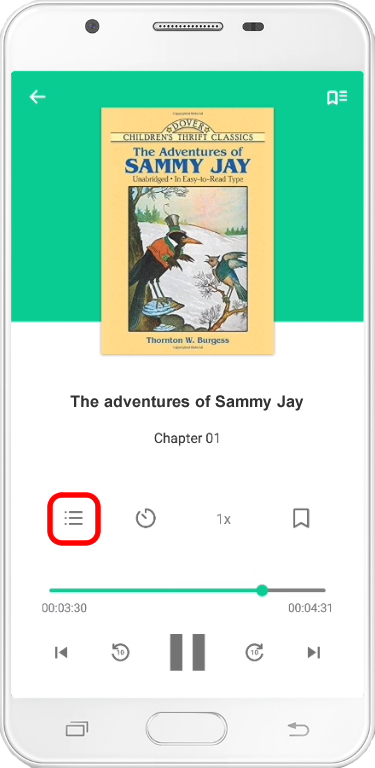
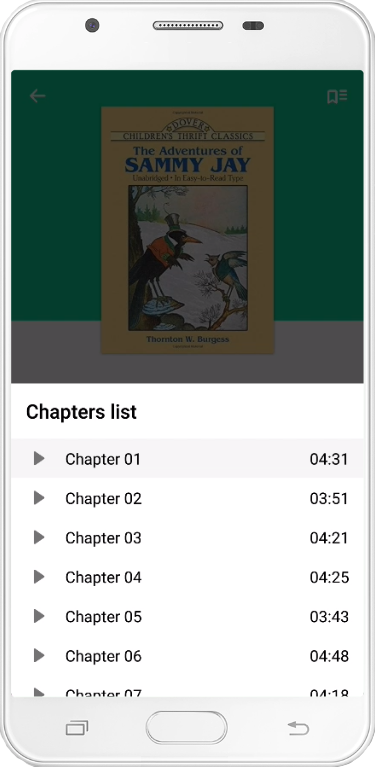
-
By pressing the list-shaped button, you will access the list of chapters of the audio or video and, if it has more than one, you can go directly to the desired chapter by clicking on it in the list.
When you want to stop playing an audio or video, pause it and press the arrow-shaped button that appears in the upper left corner of the screen. The player will close and you will return to the Bookshelf section. If your account is linked to multiple devices, the current listening or viewing point will be synchronized with the rest of the devices without you having to do anything. You just have to remember to close the player when you're done using it.
Use the timer
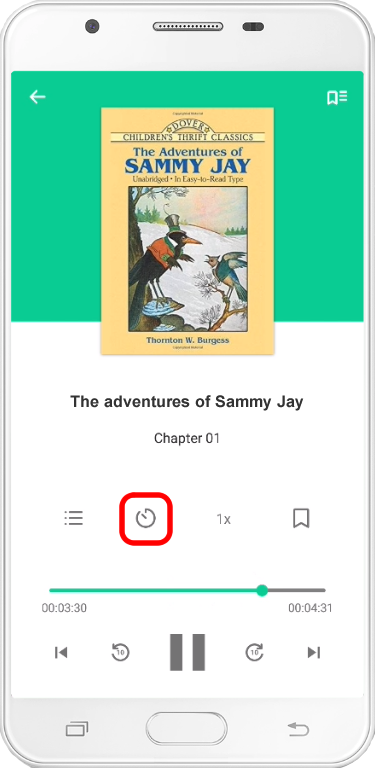
You can configure both the video and audio players to stop playing automatically when a certain amount of time has passed or the end of the chapter you are currently playing is reached.
To do so, click on the clock-shaped icon that you will find in the player's menu bar.
A window will open with buttons shaped like a plus and minus symbol that will allow you to indicate a number of minutes after which the player should stop.
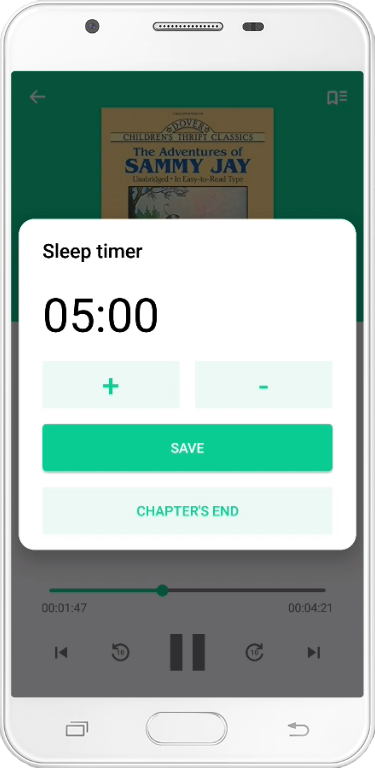
Alternatively, instead of specifying a number of minutes, you can press the End Chapter button and in that case the player will automatically stop when it reaches the end of the chapter it is currently playing.
If you have set the timer and want to delete it, all you have to do is press the clock-shaped button again and a new window will appear with the option Delete.
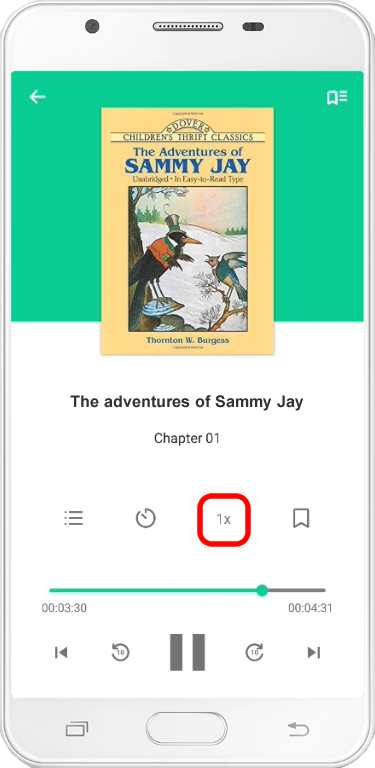
Increase or decrease playback speed
You will notice that among the player menu options there is a button with the text 1x. By clicking on it you can increase the playback speed of the audio or video.
Normal playback speed is 1x. To modify it, press the aforementioned button and the speed will increase in steps of 0.25 until it reaches 2x (double the normal speed). If you continue pressing, the speed adjustment will start from the beginning but, this time, starting at 0.5x (half the normal speed).
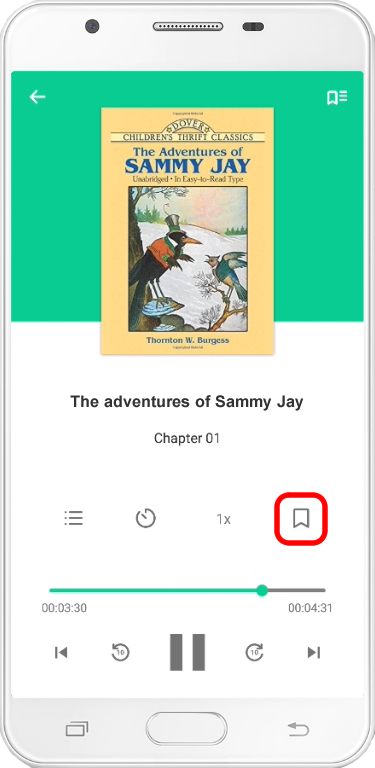
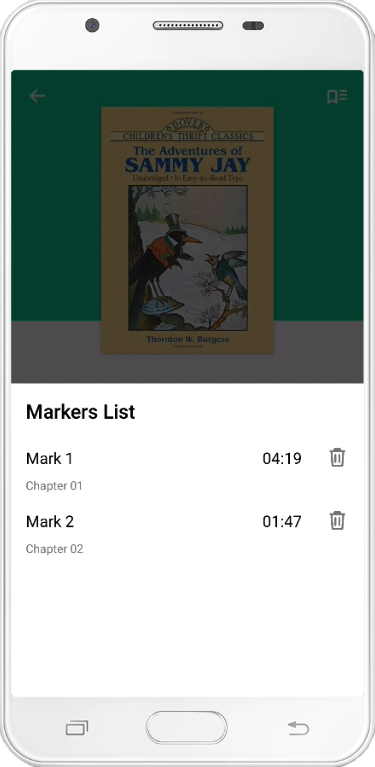
Add a mark
The app's media player also allows you to place a mark at any point in the video or audio so you can quickly return to that part at a later time.
To do so, at any time while the video or audio is playing, click on the bookmark-shaped icon that you will find in the player menu.
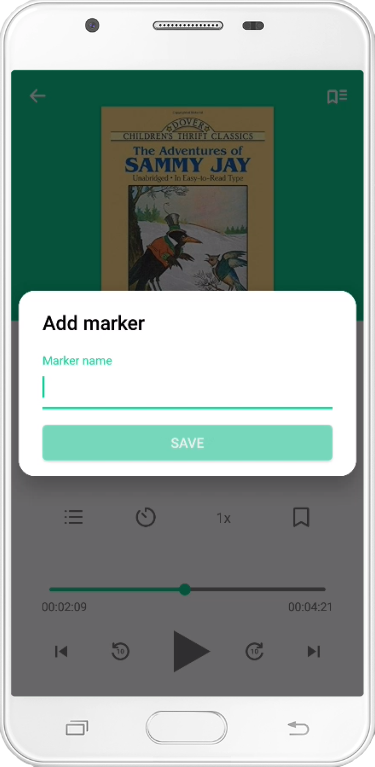
A new window will appear asking you to give the new mark a name. You can create as many bookmarks as you want.
When you want to return to a point in the audio or video where you placed a marker, click on the icon that appears in the upper right corner of the screen.
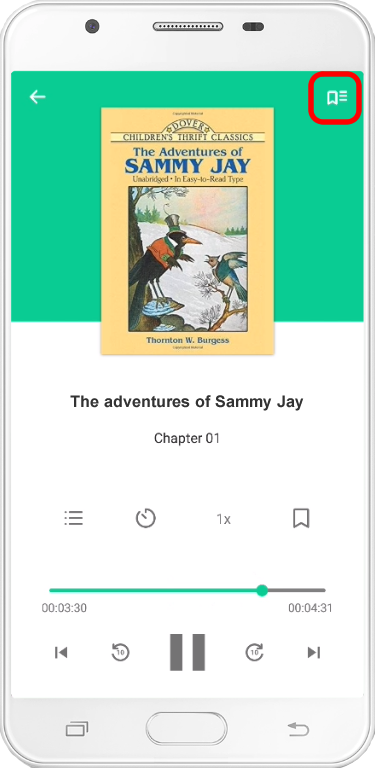
A list will open with all the bookmarks you have placed. Click on the one you are interested in, and the player will automatically take you to that point.
Create and manage custom lists
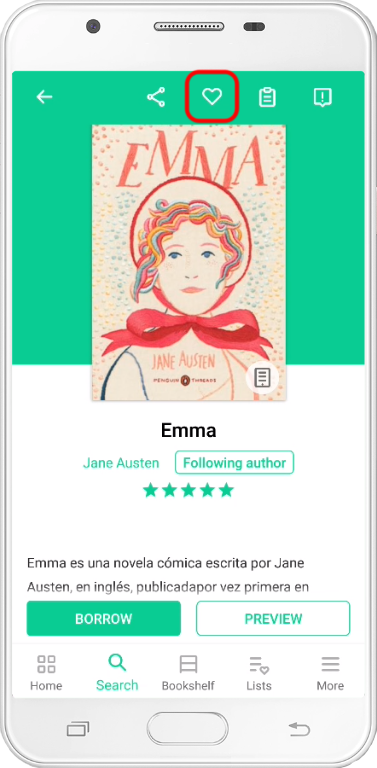
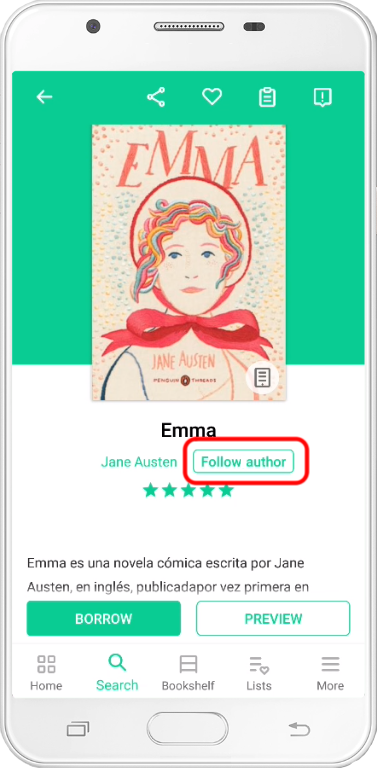
When accessing a title file, we see that a heart-shaped icon appears in the upper right corner. When you press it, the title will be added to the My Favorites list that all users have available by default. This pre-created list cannot be edited or deleted and will always be private. That is, only its owner can see it by accessing the Lists section located in the lower menu of the application. Pressing the heart icon a second time will remove the title from the favorites list.
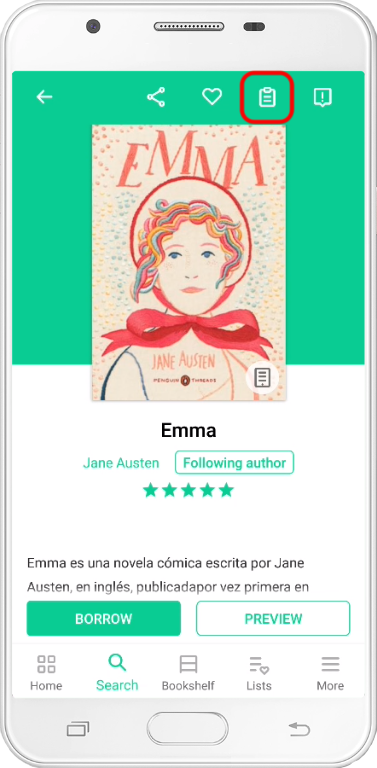
Just to the right of the favorites icon, there is a second icon that allows us to add the title we are viewing to a custom list that we have already created. When you press it, a pop-up menu will appear where we can select which custom list we want to add the title to. Clicking a second time on the list to which we have added it will remove that title from the list.
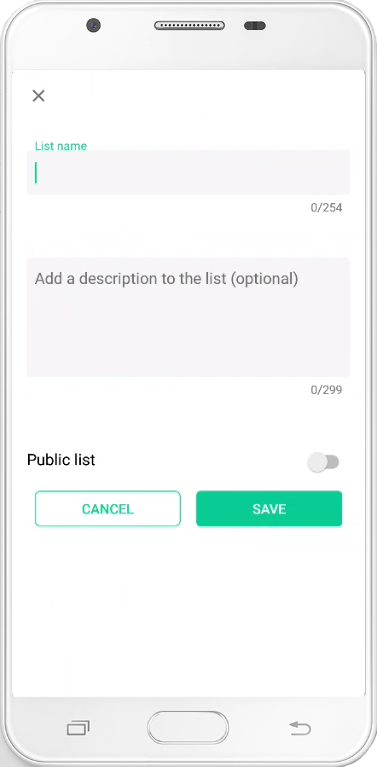
In this menu we will also be given the option to create a new custom list to which we can add the title. When clicking New list, a form will appear that the user must fill out indicating the name of the list and a description of it (optional). In that same form, you must choose if you want to make your list public. If a user marks their list as public, it will appear in the catalog and other users will be able to see it, follow it and share it on social networks. On the contrary, if the user decides not to make their list public, it will remain a private list and will only be accessible to its owner in the Lists section of the application. Private listings do not appear in the catalog and cannot be shared on social networks.
If we access the My Lists section within the Lists menu, we can see the favorites list and all other personalized lists that the user has created. If we access the details of one of them by clicking on its title, we will see the titles it contains and its description. By clicking on the three-point icon, a menu will be displayed from which we can edit the list, delete titles from it or delete the entire list. The My Favorites list is the only one that cannot be deleted as it is a pre-created list.
On the My Lists screen, users will have a button in the shape of the + symbol that will also allow them to create a new list.
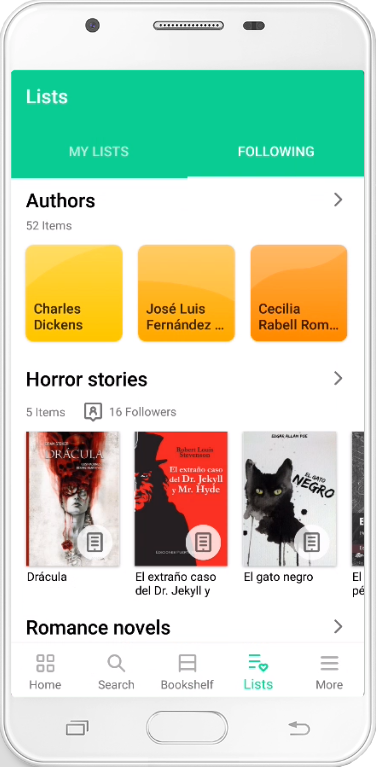
In a title file we will also find a button next to the name of its author that will allow users to follow that author. If we press the button, the author will be added to a list that users can view from the Following tab in the Lists section. If we press the button again, the action will be undone. The list of followed authors is a default list and cannot be edited, deleted or shared on social networks since, by default, it is private.
In the detail view of that list of authors we will have the options available to stop following several authors at the same time or completely empty the list. Users will receive notifications when new content from authors you are following is published on the platform.
If we locate a public list in the catalog and access its file, we will see that its name, a description (if its creator has added it) and a Follow button are displayed. strong> which will allow users to add this list to the Following tab of the Lists section. Pressing the button again will undo the previous action.
Submit a rating and review
If you access the title page you will notice that star-shaped icons appear below the cover image. By default, these stars will show the average rating that platform users have given to that content.
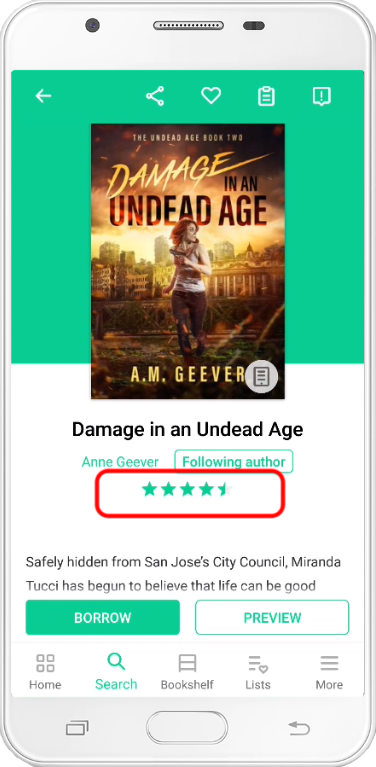
If you scroll down the tab, you'll see a graph detailing how many of each type of rating the title has received.
By clicking on the star-shaped icons, a new window will open in which you can submit your own rating for the title. Once you have rated a title, the star-shaped icons will stop showing the average grade and will start showing the grade you have given. You can modify the score by clicking on the star-shaped icons again.
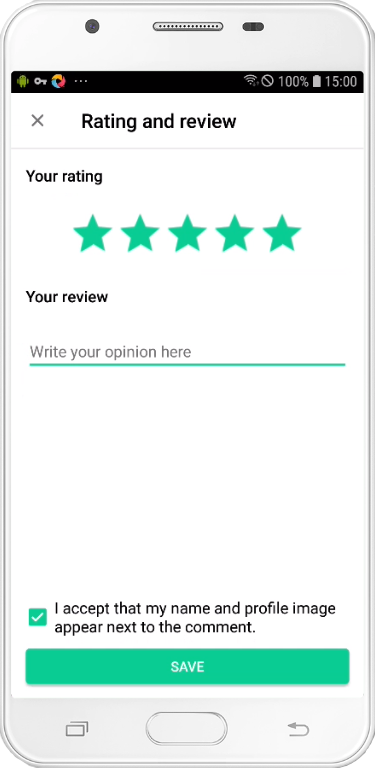
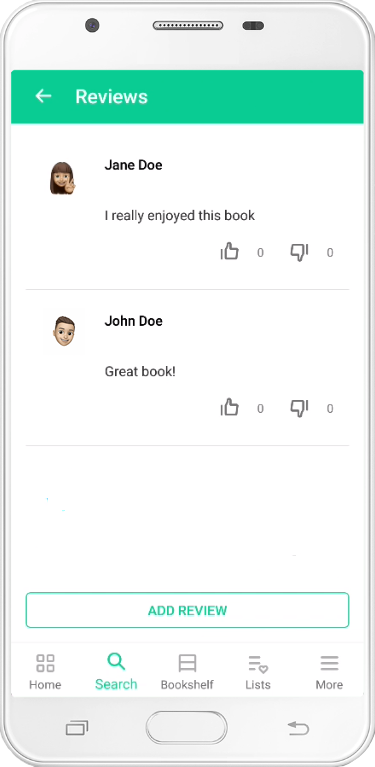
As for reviews, if you scroll to the end of the tab you will see the Add review button appear. By clicking on it, you can send your opinion about the title. When a title has reviews from multiple users, you will see a carousel displayed at the bottom of the tab with the latest comments received.
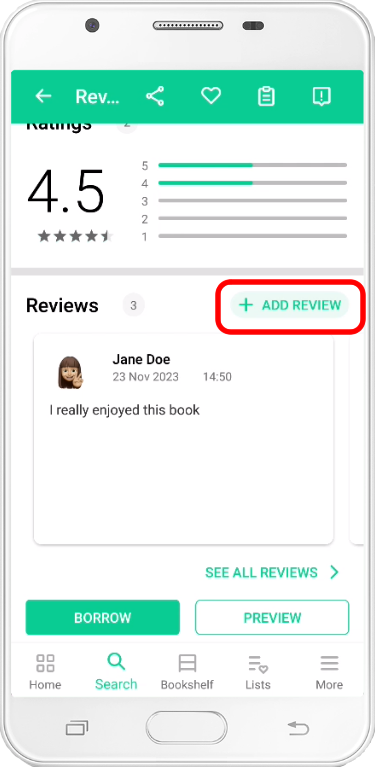
By clicking on the See all reviews button you will access the complete list of reviews about that title and you will be able to read them in full and indicate whether you liked them or not. If your platform has comment deletion configured, you can delete your reviews from this same screen.
When sending a rating or a review, you can choose to send only one of the two or both.
When you manually remove a title from your Bookshelf, the app will also offer you the ability to leave a rating and review.
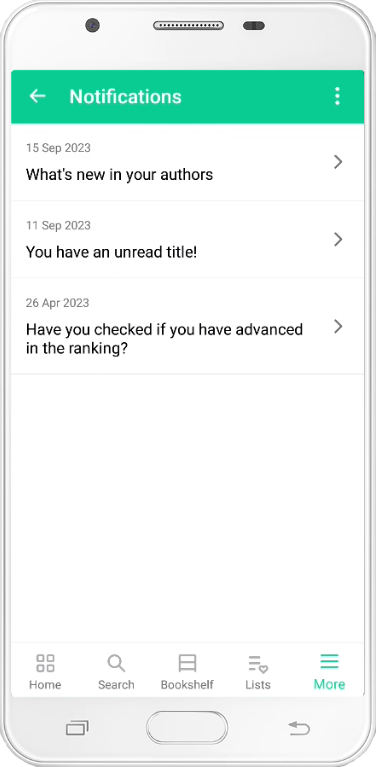
Check your notifications
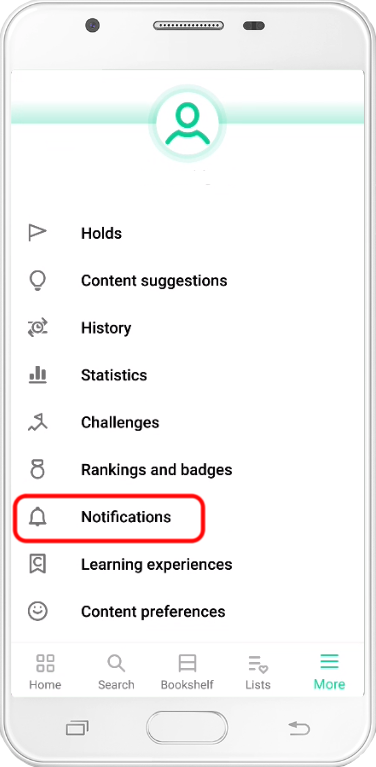
The application receives push notifications from the web platform to inform you of various issues (loans about to expire, available reservations, etc.). These notifications will appear in your device's notification rollout. If you click on them, the app will open and it will redirect you to the Notifications section so you can read them in full.
You can also access the notifications section by displaying the application menu with the More button in the bar located at the bottom of the screen.
Within the section you will find a list of all the notifications you have received. Those that have not yet been read will appear highlighted with a color indicator in the upper left corner. Once you tap on a notification, you will access the full text and it will be marked as read.
To delete notifications and stop them appearing in this section, you will have to click on the three-dot-shaped button that appears in the upper right corner of the screen. Pressing that button will open a menu with three options: Mark all as read, Select and Delete all. If you want to delete some notifications but not all, choose Select and you will return to the notifications list where you will see that a multiple selection tool and a trash button now appear at the top right of the screen.
Another option to delete notifications is to open the notification you want to delete and, once you are viewing the full text, use the trash can button that appears in the upper right corner.
Report a problem with a title
If you are trying to add a title to your Bookshelf but you receive an error that prevents you from doing so, you can report it to our support service by clicking the icon that appears in the upper right corner of the title file.
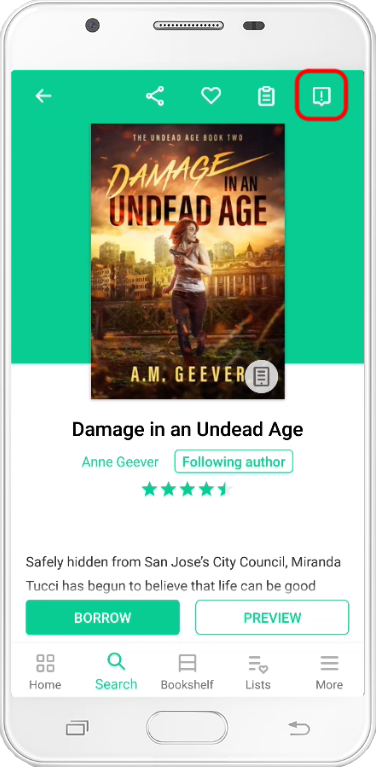
When you tap it, a form will appear for you to provide details about the problem. Once the bug report is submitted, our support agents will review the title to resolve the issue as soon as possible.
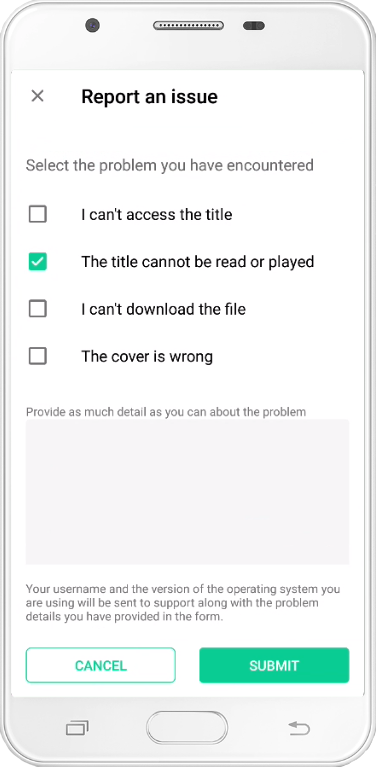
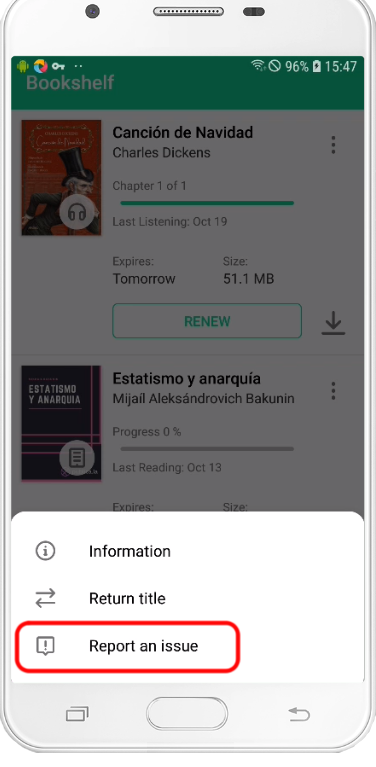
If you already have the title added to your Bookshelf but you have a problem that prevents you from accessing its content, you can also report it to our support department. Click on the 3-dot icon that appears next to the title and in the menu that appears, select Report an issue.
Automatic downloads
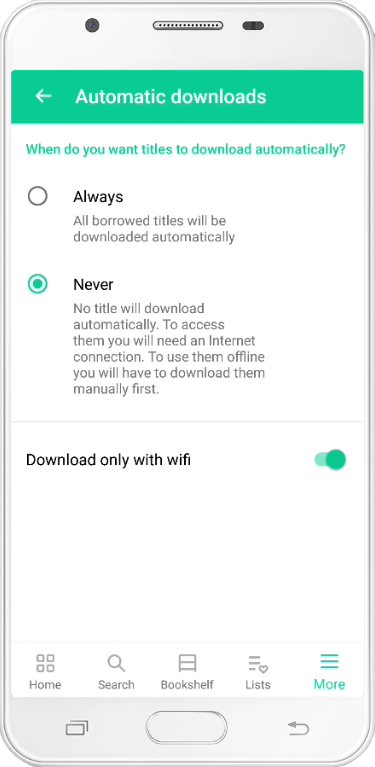
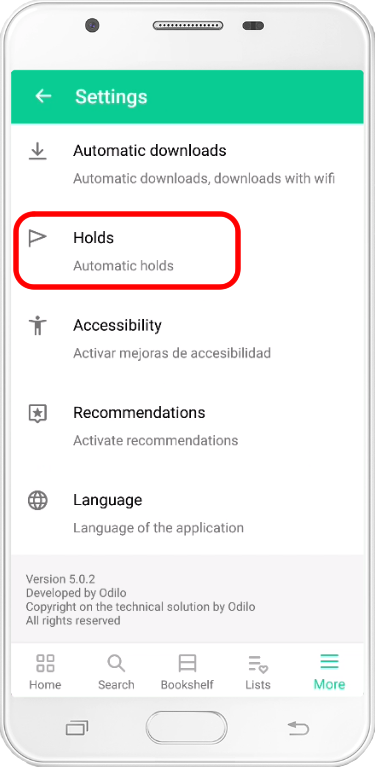
By default, the application will not automatically download the titles you have in the Bookshelf. If you want to modify this behavior, go to the menu More >> Settings >> Automatic downloads.
The options you have to choose from are:
- Always: The titles you have in the Shelf will always be downloaded automatically.
- NeveA: Titles in your bookshelf will never be downloaded automatically. If you select this option you will have to download the titles manually from the bookshelf.

Additionally, there is a last option called Download only with Wifi. If that option is activated, the application will download titles from the bookshelf automatically based on the option you chose in the previous step, but it will only do so when you are connected to a WiFi network. If you are not, it will not download anything automatically.
On the contrary, if you uncheck the Download only with Wifi option, the application will download the titles automatically following the behavior you have selected and will do so regardless of whether you are connected to a WiFi network or you are using your device's mobile data. Some files can take up quite a few megabytes or even several gigabytes, so you should be careful not to deactivate this option if you do not want to consume your mobile data.
Holds
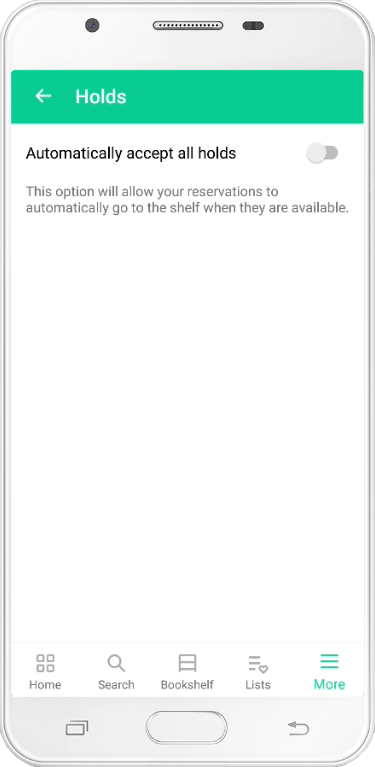
So you do not miss the opportunity to borrow the book because you cannot accept the hold on time, the application has a functionality to automatically accept holds for you. When that happens, you will receive a notification indicating that you already have the title you were waiting for available on your Bookshelf. However, if you wish, you can modify this behavior by accessing the menu More >> Settings >> Holds.
If you deactivate the automatic acceptance of holds, when you have reserved a title and it is available so that you can borrow it, you will receive a notification and you will have a period of time to make the loan effective. If the deadline expires, your hold will be automatically canceled and the title will become available to the next person on the reservation list.
Change the language
If you want to change the language of the application, open the More menu and go to the Settings section.
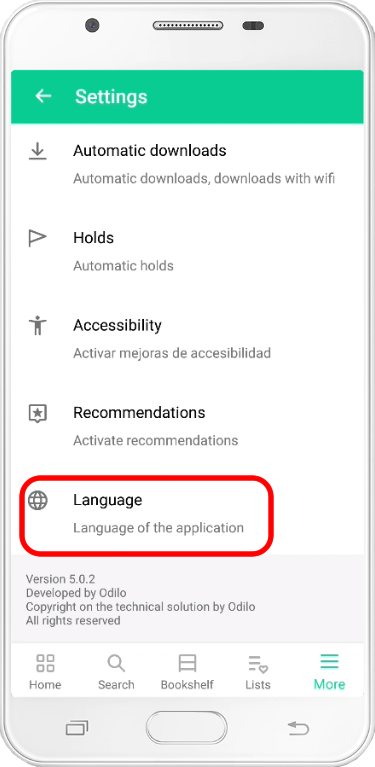
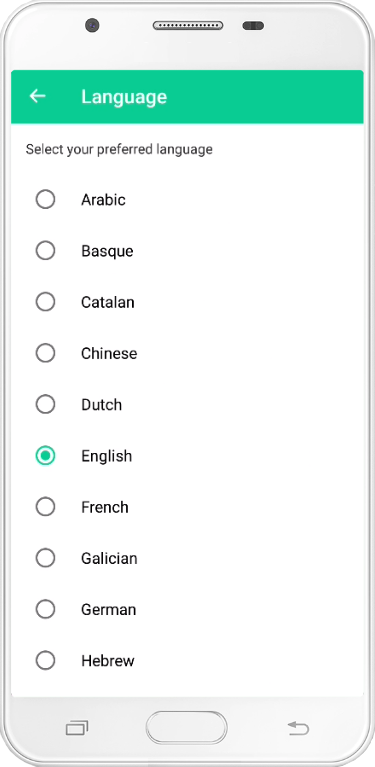
Within the Settings section you will find the Language option. Accessing it you will find the list of languages that you can select.
Add profile picture
Access the My Account section located within the More menu and click on the menu entry called Profile picture. The app will ask you if you want to select a photo from your image gallery or if you want to take a photo with the device's camera. Select the option you prefer and with it you can set your profile image.
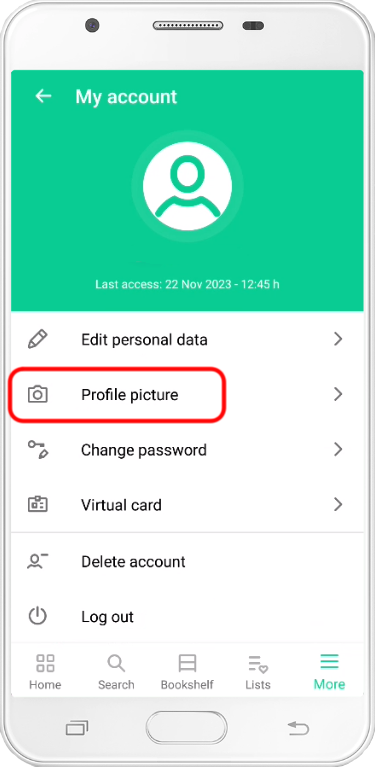
If at any time you want to delete your profile picture, press the Profile picture menu entry again and you will see the option to delete it in the drop-down menu.
Edit your personal information
If your platform allows editing user data, open the More menu of the application and access the My account section. Once inside, you will see a menu entry called Edit personal data.
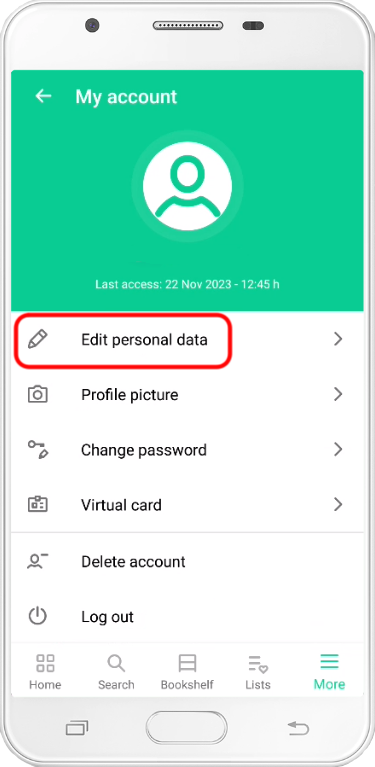
Select it and a form will appear for you to modify your data. Once you are done, press the Save button to confirm the changes.
Change your password
If your platform allows you to change the password, when you display the More menu and access the My account section you will notice that an entry called Change password appears in the menu.
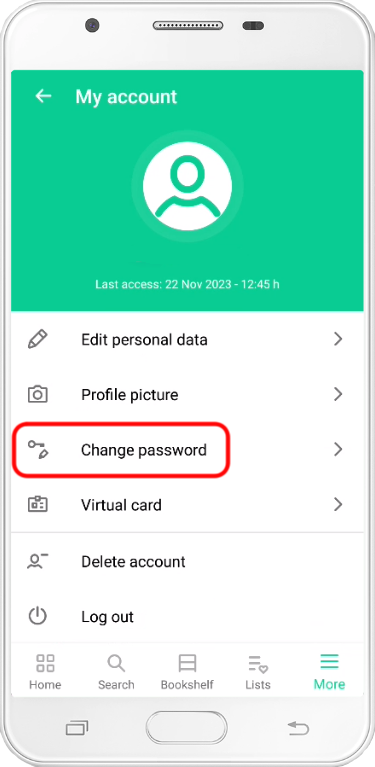
By clicking on it, the app will allow you to modify your password. Press the Save button to confirm the change.
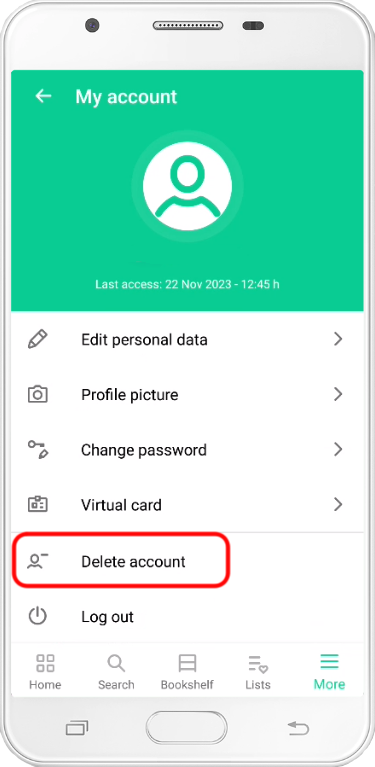
Delete account
If you want to delete your user account, open the More menu and go to the My account section. Once inside, you will see that the Delete account option appears at the bottom of the list. If you press it, you will be asked for confirmation before deleting the account. If you confirm the action, your user account will be deleted and you will not be able to access the app with it again.
If you access the My account section and do not find the Delete account option, it is because your platform uses an authentication system developed by third parties that does not allow the deletion of accounts directly from the app. In this case, to delete your account you must send an email to support@odilo.us to request it.
Log out
If you want to log out of the application, open the More menu and go to the My account section. Once inside, you will see the option Log out at the bottom of the list.
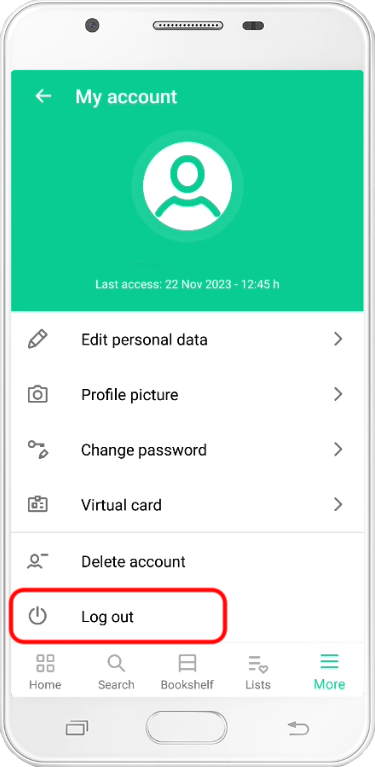
If you press it, you will exit the application and your user account will be unlinked from the device you are using. All your personal information and any downloaded titles will be deleted from your device.
Q: What devices is the app compatible with?
A: The app is available for Android and iOS devices.
- The application for Android devices requires version 5.1 or higher.
- The application for iOS devices requires version 13 or higher.
Q: I don't remember my password, how can I recover it?
A: If your platform allows the option to recover your password, when you open the application you will notice that a link appears just below the Login button with the text “Have you forgotten your password?” Press it and follow the instructions to recover your password. If the aforementioned link does not appear, then you will have to contact those responsible for your platform to tell you how to recover the password.
Q: I don't have a user account, how can I get one?
A: If your platform allows user self-registration, when you open the application you will see that another button appears below the Login button with the text "Sign up". Press it and fill in the fields with the necessary information to create your account. If the sign up button does not appear, then the platform does not allow users to register on their own and you will have to contact those responsible for it to tell you how you can obtain your account.
Q: I am trying to borrow a title but the app tells me that I have already made the maximum number of loans allowed.
A: The most common mistakes when making a loan are usually that you have already reached the limit of simultaneous loans allowed or that you have already consumed the maximum number of loans allowed in a period. Both errors occur because your platform's lending policy establishes restrictions on the number of loans that can be made simultaneously and/or on the number of loans that are made in a period. To learn more about your platform's lending policy, you will have to contact those responsible.
Q: I'm trying to reserve a title but the app tells me that I have already made the maximum number of holds allowed.
A: As with loans, those responsible for the platform can decide to limit the number of simultaneous holds that each user can have. To know more details about the reservation policy you must contact them.
Q: I want to use a title but I get an error and I can't access it.
A: You can report a problem with a resource by following the steps in the "Report a problem with a title" section of this help manual. Our support agents will review the problem to try to solve it as soon as possible.